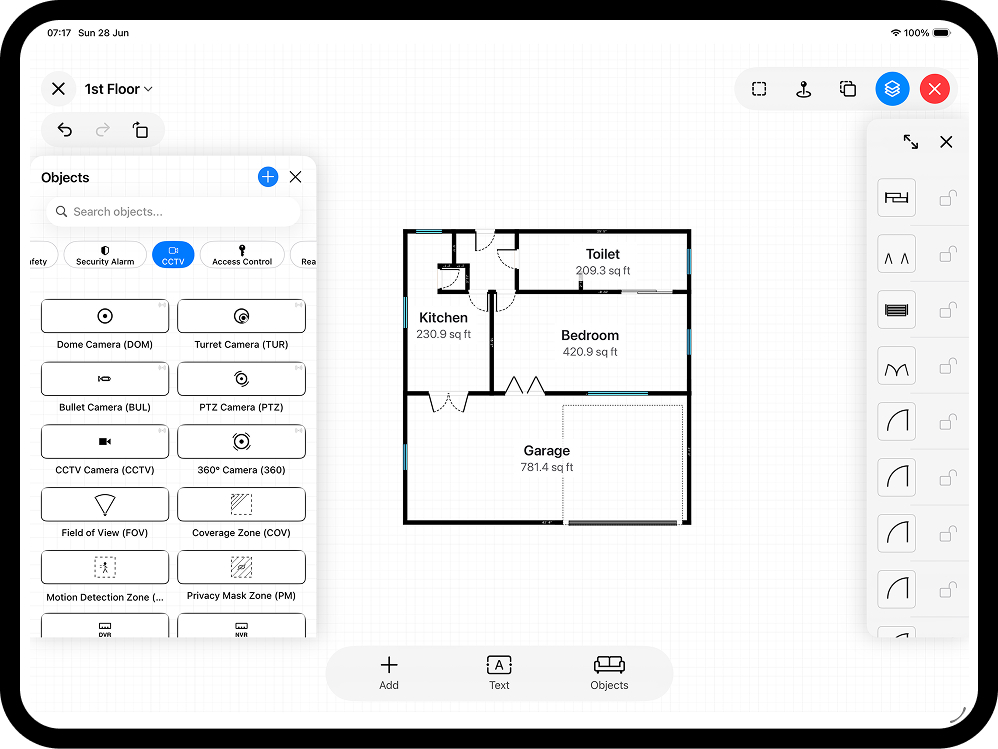
Every floor plan mistake is cheap on paper and expensive everywhere else: the sofa that does not clear the door, the kitchen island with no walkway, the licence application bounced for missing room sizes. After enough surveys you see the same ten mistakes on repeat. Here they are, why they happen, and how to make each one impossible.
Measurement mistakes
1. Trusting a single measurement
Measure a wall once and you have a guess; measure the opposite wall and a diagonal and you have a room. Old buildings are rarely square, and a plan drawn from one width per room hides taper that eats furniture space. If you scan with LiDAR the geometry comes from thousands of measurements at once; if you measure by hand, follow the routine in our guide to measuring a room.
2. Ignoring wall thickness
Beginners draw walls as single pencil lines, which quietly deletes 10-30 cm from every span. Across a flat that error compounds: three internal walls drawn with no thickness invent half a metre of space that does not exist. Draw walls as walls; any proper floor plan tool does this for you.
Doors, windows and clearances
3. Forgetting door swings
The single most common mistake on amateur plans. A door needs its full quarter-circle of floor, and furniture placed inside that arc gets hit every day. Draw every door with its swing, then treat the arc as a no-go zone. It also matters which side the hinge is on: re-hanging a door on paper is free.
4. Misplacing the windows
Windows drawn "roughly there" ruin furniture plans: the desk that was meant to sit under the window lands half against brick. Position windows by measuring from the nearest corner, and note the sill height where it affects what can stand beneath.
Furniture and flow
5. Furniture drawn hopefully, not to scale
A sofa sketched "about that big" is a wish, not a plan. Use symbols drawn to real dimensions; RoomPlot's object catalogue is sized to real-world furniture, so a plan that works on screen works in the room. If a piece only fits when you nudge it a little smaller, it does not fit.
6. No walkways
Rooms are used moving, not standing still. The clearances that keep a layout liveable:
- 60 cm minimum for a secondary walkway; 90 cm for a main route.
- 70 cm behind a dining chair so it can be pushed back.
- 60 cm in front of wardrobes and appliance doors.
7. Forgetting storage
Plans drawn without wardrobes, cupboards and bookcases look wonderfully spacious right up until the owners move in. Put the storage on the plan first, at real depth (about 60 cm for a wardrobe), and let the remaining space be the honest number you design with.
Presentation mistakes
8. No dimensions or scale reference
A plan without dimensions or a scale bar cannot be checked, quoted from, or submitted. Turn dimensions on for the walls that matter and add a scale bar so a printout stays measurable. Councils and licensing officers will send back plans without room sizes.
9. Missing room names and areas
"Bedroom 2, 11.8 m²" answers questions before they are asked, and for HMO and licensing work the areas are the application. Use zone labels that calculate the area automatically rather than typing figures by hand, and you cannot mistype them.
10. No north arrow
Orientation decides which rooms get morning sun, where glare lands, and how a buyer reads the garden. It costs one symbol. Our guide to reading a floor plan shows how much a reader infers from it.
Make the mistakes impossible
Most of this list disappears when the plan is captured rather than sketched. Scanning with LiDAR gets the geometry, walls and openings right in one pass; drawing manually in RoomPlot gives you real wall thickness, snapped corners, doors with proper swing arcs, to-scale furniture and automatic room areas by default. Undo is always there, and the plan exports with dimensions and a scale bar when you are done.
Tip. Before you send any plan, walk it: enter at the front door on paper and move through every room to the furthest window. Every clash on this list, blocked swings, pinched walkways, missing labels, reveals itself on that one imaginary walk.
Ten mistakes, one fix: make the plan real. Scan or draw your next floor plan in RoomPlot on iPhone or iPad, and it will be accurate, labelled and to scale by construction, not by luck.