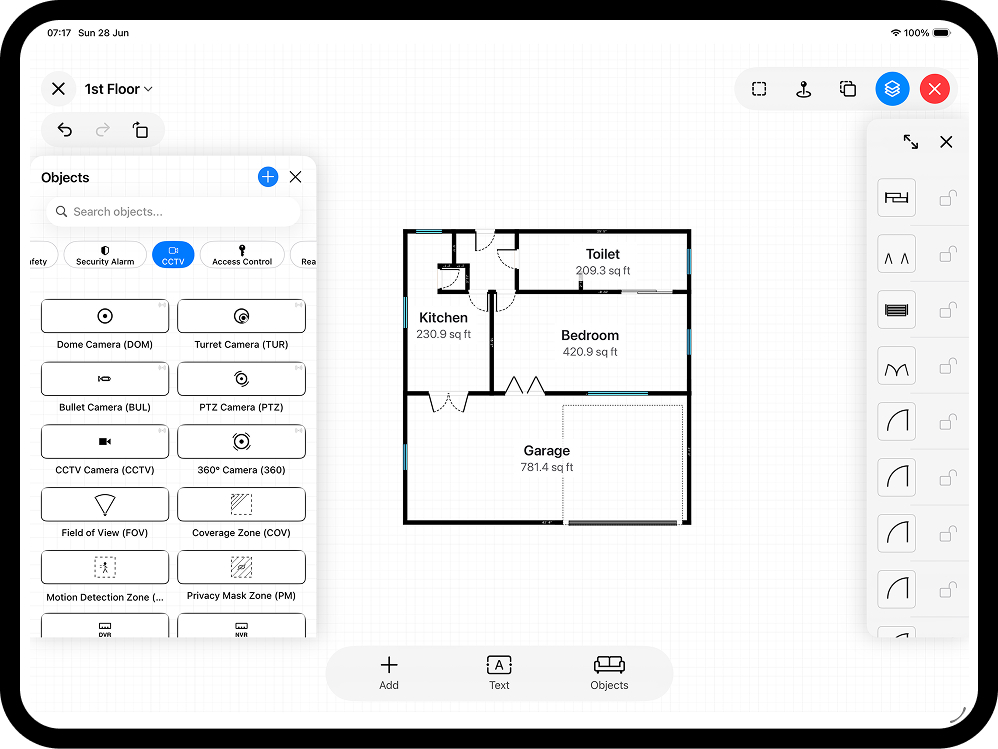
There are two ways to turn a real room into a floor plan on an iPhone: scan it with the LiDAR sensor, or draw it by hand. Both end in the same fully editable, professional plan - but the fast route changes with your device, the site, and whether the building even exists yet. Independent testing puts iPhone-class LiDAR at roughly 1-3 cm accuracy at normal room distances, which is plenty for surveys, estimates, and marketing plans - and not enough for permit-grade drawings. This guide compares both methods honestly so you pick the quicker one for each job.
The two capture methods
LiDAR scanning uses the depth sensor built into Apple's Pro hardware: every iPhone Pro and Pro Max from the iPhone 12 Pro onwards, and every iPad Pro since the 2020 models. You point the camera, walk the perimeter, and RoomPlot detects walls, doors, windows, and openings automatically in seconds - the scan lands as an editable plan, not a locked image. Manual drawing needs no special hardware: you start from a room-shape template - Square, Rectangle, or one of four L-shape orientations - and edit it into the real layout with smart snapping and exact typed dimensions. It's the camera-free route, and it works on any iPhone, including standard, Plus, mini, and SE models, none of which carry the LiDAR sensor.
How accurate is a LiDAR scan, really?
Field testing of iPhone-class LiDAR is consistent: expect roughly 1-3 cm accuracy at distances under 3 m, drifting to 3-5 cm between 3 and 4 m, and 5-10 cm as you approach the sensor's ~5 m indoor range limit. In a typical UK room you are almost never more than 3 m from a wall, so wall lengths and floor areas come back within a few centimetres - comfortably inside the 1-10% measurement tolerance that RICS guidance treats as acceptable for stated-standard floor areas, provided you record the tolerance you worked to. That makes a scan suitable for agency floor plans, HMO room-size checks (verify final figures with a tape before submitting to your local authority), estimates, and material take-offs - but not for permit-grade as-built drawings or anything needing sub-centimetre control.
Three habits noticeably improve scan quality:
- Move slowly and stay close. Walk at half your normal pace, keep the device at chest height, and stay within about 3 m of the surfaces you're capturing.
- Pause at corners. A brief hold lets the mesh stabilise where walls meet - corners are where drift shows up.
- Watch for glass and mirrors. Reflective surfaces confuse depth sensors; expect to tidy those walls by hand afterwards.
When to scan
- The building exists and you're standing in it. Scanning captures a real room in seconds instead of measuring every wall - across a whole house that's the difference between minutes and an hour of tape work.
- Awkward geometry. Bay windows, alcoves, splayed walls, and odd angles are far quicker to scan than to plot by hand.
- You have a Pro device. LiDAR is only on iPhone Pro/Pro Max and iPad Pro; RoomPlot hides the scanner on models without it, so you'll simply see the drawing tools instead.
When to draw by hand
- No LiDAR. On a standard iPhone, drawing is your route - smart snapping keeps walls square and typed dimensions keep them exact.
- Working from existing measurements. If you already have a laser or tape survey, or a builder's dimensions, typing exact lengths is faster and more precise than scanning.
- The space isn't built yet. Proposed layouts, extensions, and "what if we move this wall" plans have nothing to scan - draw them.
- You need stated-dimension precision. When a figure will be checked against a standard - an HMO minimum room size, for instance - a measured, typed dimension is defensible in a way a raw scan isn't.
A hybrid workflow for survey day
- Scan each room on a Pro device, pausing at corners. On multi-storey properties, add each level as a separate floor in the same project.
- Spot-check two or three dimensions per floor with a laser measure - typically the longest wall and any dimension a regulation or client cares about - and type the exact figures in.
- Attach evidence as you go: photos, notes, and voice memos pinned to the plan mean no second visit for the detail you forgot.
- Add the North marker and room names, let auto room areas total the floor space in metric or imperial, then export - PNG/JPG for a listing, a branded multi-page PDF report for a client, or DXF if the plan is heading into CAD.
Why bother getting the plan right at all? On Rightmove, a missing floor plan is one of the most common causes of listing underperformance, and over a third of buyers say they're less likely to enquire about a property without one - accurate room dimensions are part of what makes a plan worth publishing.
What both methods share
Whichever way you start, you end up with the same thing: an editable plan. You can move and resize walls, add doors and windows, name rooms, calculate areas automatically, drop in furniture and trade symbols - fire, security, CCTV coverage cones, access control - and export to PDF, DXF, USDZ, or an image. Snapping, a 20 pt grid, 2D and 3D editing, and full undo/redo work in both modes. One honest limit worth knowing: true camera-based AR capture needs LiDAR - on a non-Pro device you draw rather than scan, but the finished plan is just as professional, and nobody looking at the export can tell which method produced it.
Frequently asked questions
Do I need an iPhone Pro to make a floor plan?
No. LiDAR scanning needs a Pro device (iPhone 12 Pro or later Pro/Pro Max, or any iPad Pro from 2020 on), but you can draw an accurate, fully editable plan by hand on any iPhone using shape templates, snapping, and exact typed dimensions.
Is a LiDAR scan accurate enough for professional work?
For most of it, yes: 1-3 cm at normal room distances covers estate agency plans, estimates, and take-offs. For permit drawings, structural work, or any legally checked dimension, verify with a tape or laser and treat the scan as a starting point.
Is a scanned plan less editable than a drawn one?
No. A scan turns straight into an editable plan - you can move walls, add openings, and set exact dimensions exactly as you would with a hand-drawn one.
Can I combine scanning and drawing?
Yes, and it's usually the quickest route: scan the shell, then refine it by hand with exact dimensions where they matter.
New to the whole process? Read the step-by-step guide or browse more floor-plan guides.