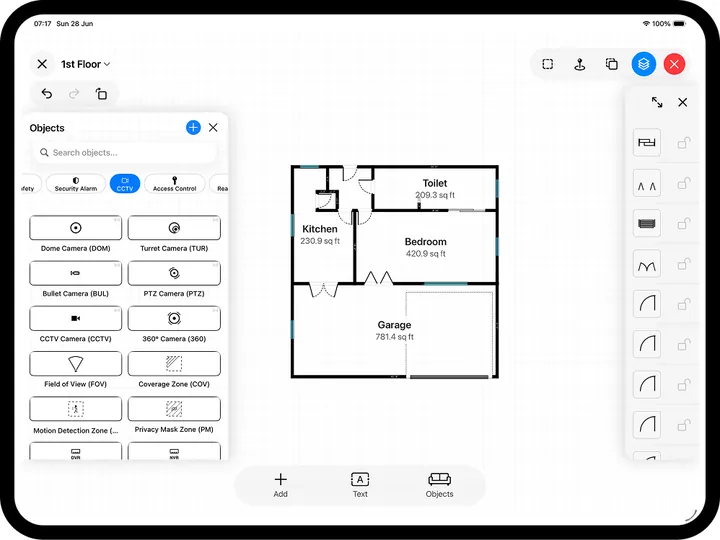
If you are registering a GP practice, taking over a surgery, or reworking your rooms, sooner or later someone asks for a floor plan. The Care Quality Commission requests one, sometimes called a layout plan, as a supporting document when you register premises, and the same drawing earns its keep long after registration day: infection control audits, fire risk assessments, room reallocation, and lease discussions all go faster with an accurate plan on the table. This guide shows how to produce a clear, professional GP surgery floor plan on an iPhone or iPad, without hiring a CAD technician.
Why a GP practice needs a floor plan
A surgery floor plan is not just a registration formality. A good one shows, at a glance, how the premises actually works as a clinical environment:
- CQC registration and inspection. The CQC asks for a floor plan showing the rooms in the premises and what each is used for. Inspectors also walk the building, so a plan that matches reality sets the right tone.
- Infection prevention and control. IPC audits are much easier when clinical rooms, hand-wash points, and clean and dirty utility areas are labelled on one drawing.
- Fire safety. Your fire risk assessment needs escape routes, extinguisher points, call points, and assembly arrangements, and a floor plan is the natural place to record them.
- Space planning. Practices grow. Knowing the exact area of every room makes it far easier to argue for an extra consulting room, a phlebotomy space, or a bigger waiting area.
Step 1 - Capture the building accurately
Start with the shell: walls, doors, and windows, drawn to scale. With RoomPlot there are two routes, and you can mix them. On an iPhone Pro or iPad Pro with a LiDAR scanner, walk each room and the app detects walls, doors, and windows automatically; a multi-room scan merges the whole surgery into one structure. On any other device, draw the rooms by hand from a room-shape template, with snapping keeping corners square. Either way you end up with a fully editable plan, not a flat picture, so you can set exact wall lengths where a dimension matters.
Tip. Scan outside clinic hours. An empty waiting room and open consulting-room doors give the scanner clean sight lines, and you will not be working around patients. A typical branch surgery scans in well under an hour.
Step 2 - Label every room by its use
This is the part reviewers actually read. Use zone labels to name each room by function, in the language your registration and audits use: waiting room, reception, consulting room 1, treatment room, dirty utility, accessible WC, staff room, records store. RoomPlot detects enclosed rooms and calculates each area automatically, so every label can carry its floor area too. If a room has a dual use, say so on the label: honesty on the plan saves questions later.
Step 3 - Mark clinical detail and safety equipment
Once the shell and labels are in, add the detail that turns a plan into a working document. RoomPlot's symbol library covers the equipment a surgery plan typically shows:
- Fire safety symbols - extinguishers, manual call points, smoke and heat detectors, fire doors, escape-route arrows, an assembly point, and a defibrillator (AED) marker for your emergency equipment.
- Electrical symbols - sockets, switches, and consumer units in UK or US style, useful when you are planning where clinical equipment or IT will live.
- Furniture and fixtures - desks, chairs, beds, and bathroom fittings from a 600-item catalog, so a consulting room layout reads instantly.
- Annotations - free text labels and "You Are Here" callouts for anything the library does not cover, such as a hand-wash basin note or a records-storage restriction.
Keep one rule in mind: a plan is for communicating, not decorating. Add the symbols that answer real questions from the CQC, your IPC lead, or your fire risk assessor, and leave the rest off.
Step 4 - Check areas and accessibility
Room areas matter in a surgery: a consulting room that is too small for a couch, a chaperone, and a wheelchair turning circle is a problem you want to spot on paper. RoomPlot calculates gross internal areas from the wall geometry, and you can override or rename any area in the report settings. If you need to be precise about how the figure is derived, read our guide to calculating floor area. While you are checking dimensions, confirm the accessible essentials: door widths on patient routes, an accessible WC, and a step-free way in, all of which are easy to verify on a scaled plan.
Step 5 - Export a document people can act on
When the plan is right, export it in the format each audience needs:
- A4 PDF or PNG for the CQC registration upload, notice boards, and your practice file. A banner title such as "Ground Floor - Room Layout" keeps multi-floor sets tidy.
- A multi-page branded report with a cover page, per-floor plans, an automatic symbol legend, and a room and area summary, plus your practice logo and address. Useful for partners, the ICB, or a landlord.
- DXF if an architect or shopfitter asks for CAD: RoomPlot's DXF export opens in any CAD package or viewer.
Surgeries on more than one level are no harder: add each floor in the same project and export them together, so the whole premises lives in one document.
Common questions
Does the CQC need a professionally drawn plan?
No. The CQC asks for a clear plan of the premises showing the rooms and how they are used. It needs to be accurate and legible, not produced by an architect. A scaled plan exported from a scan more than meets the bar.
How accurate should the measurements be?
Scan-based plans are accurate to within a few centimetres, which is more than enough for registration and audits. If a single dimension is critical, say for a piece of clinical equipment, check it with a tape or laser and type the exact figure into the plan.
What about patient privacy when scanning?
Scan when rooms are empty. The plan itself contains geometry and labels, not photographs of people, and you control any photos you choose to attach.
An accurate floor plan is one of the cheapest pieces of compliance work a practice can do, and you only have to do it properly once. Download RoomPlot, scan or draw your surgery, and export a CQC-ready plan today. For more guides like this, browse all our floor plan articles.