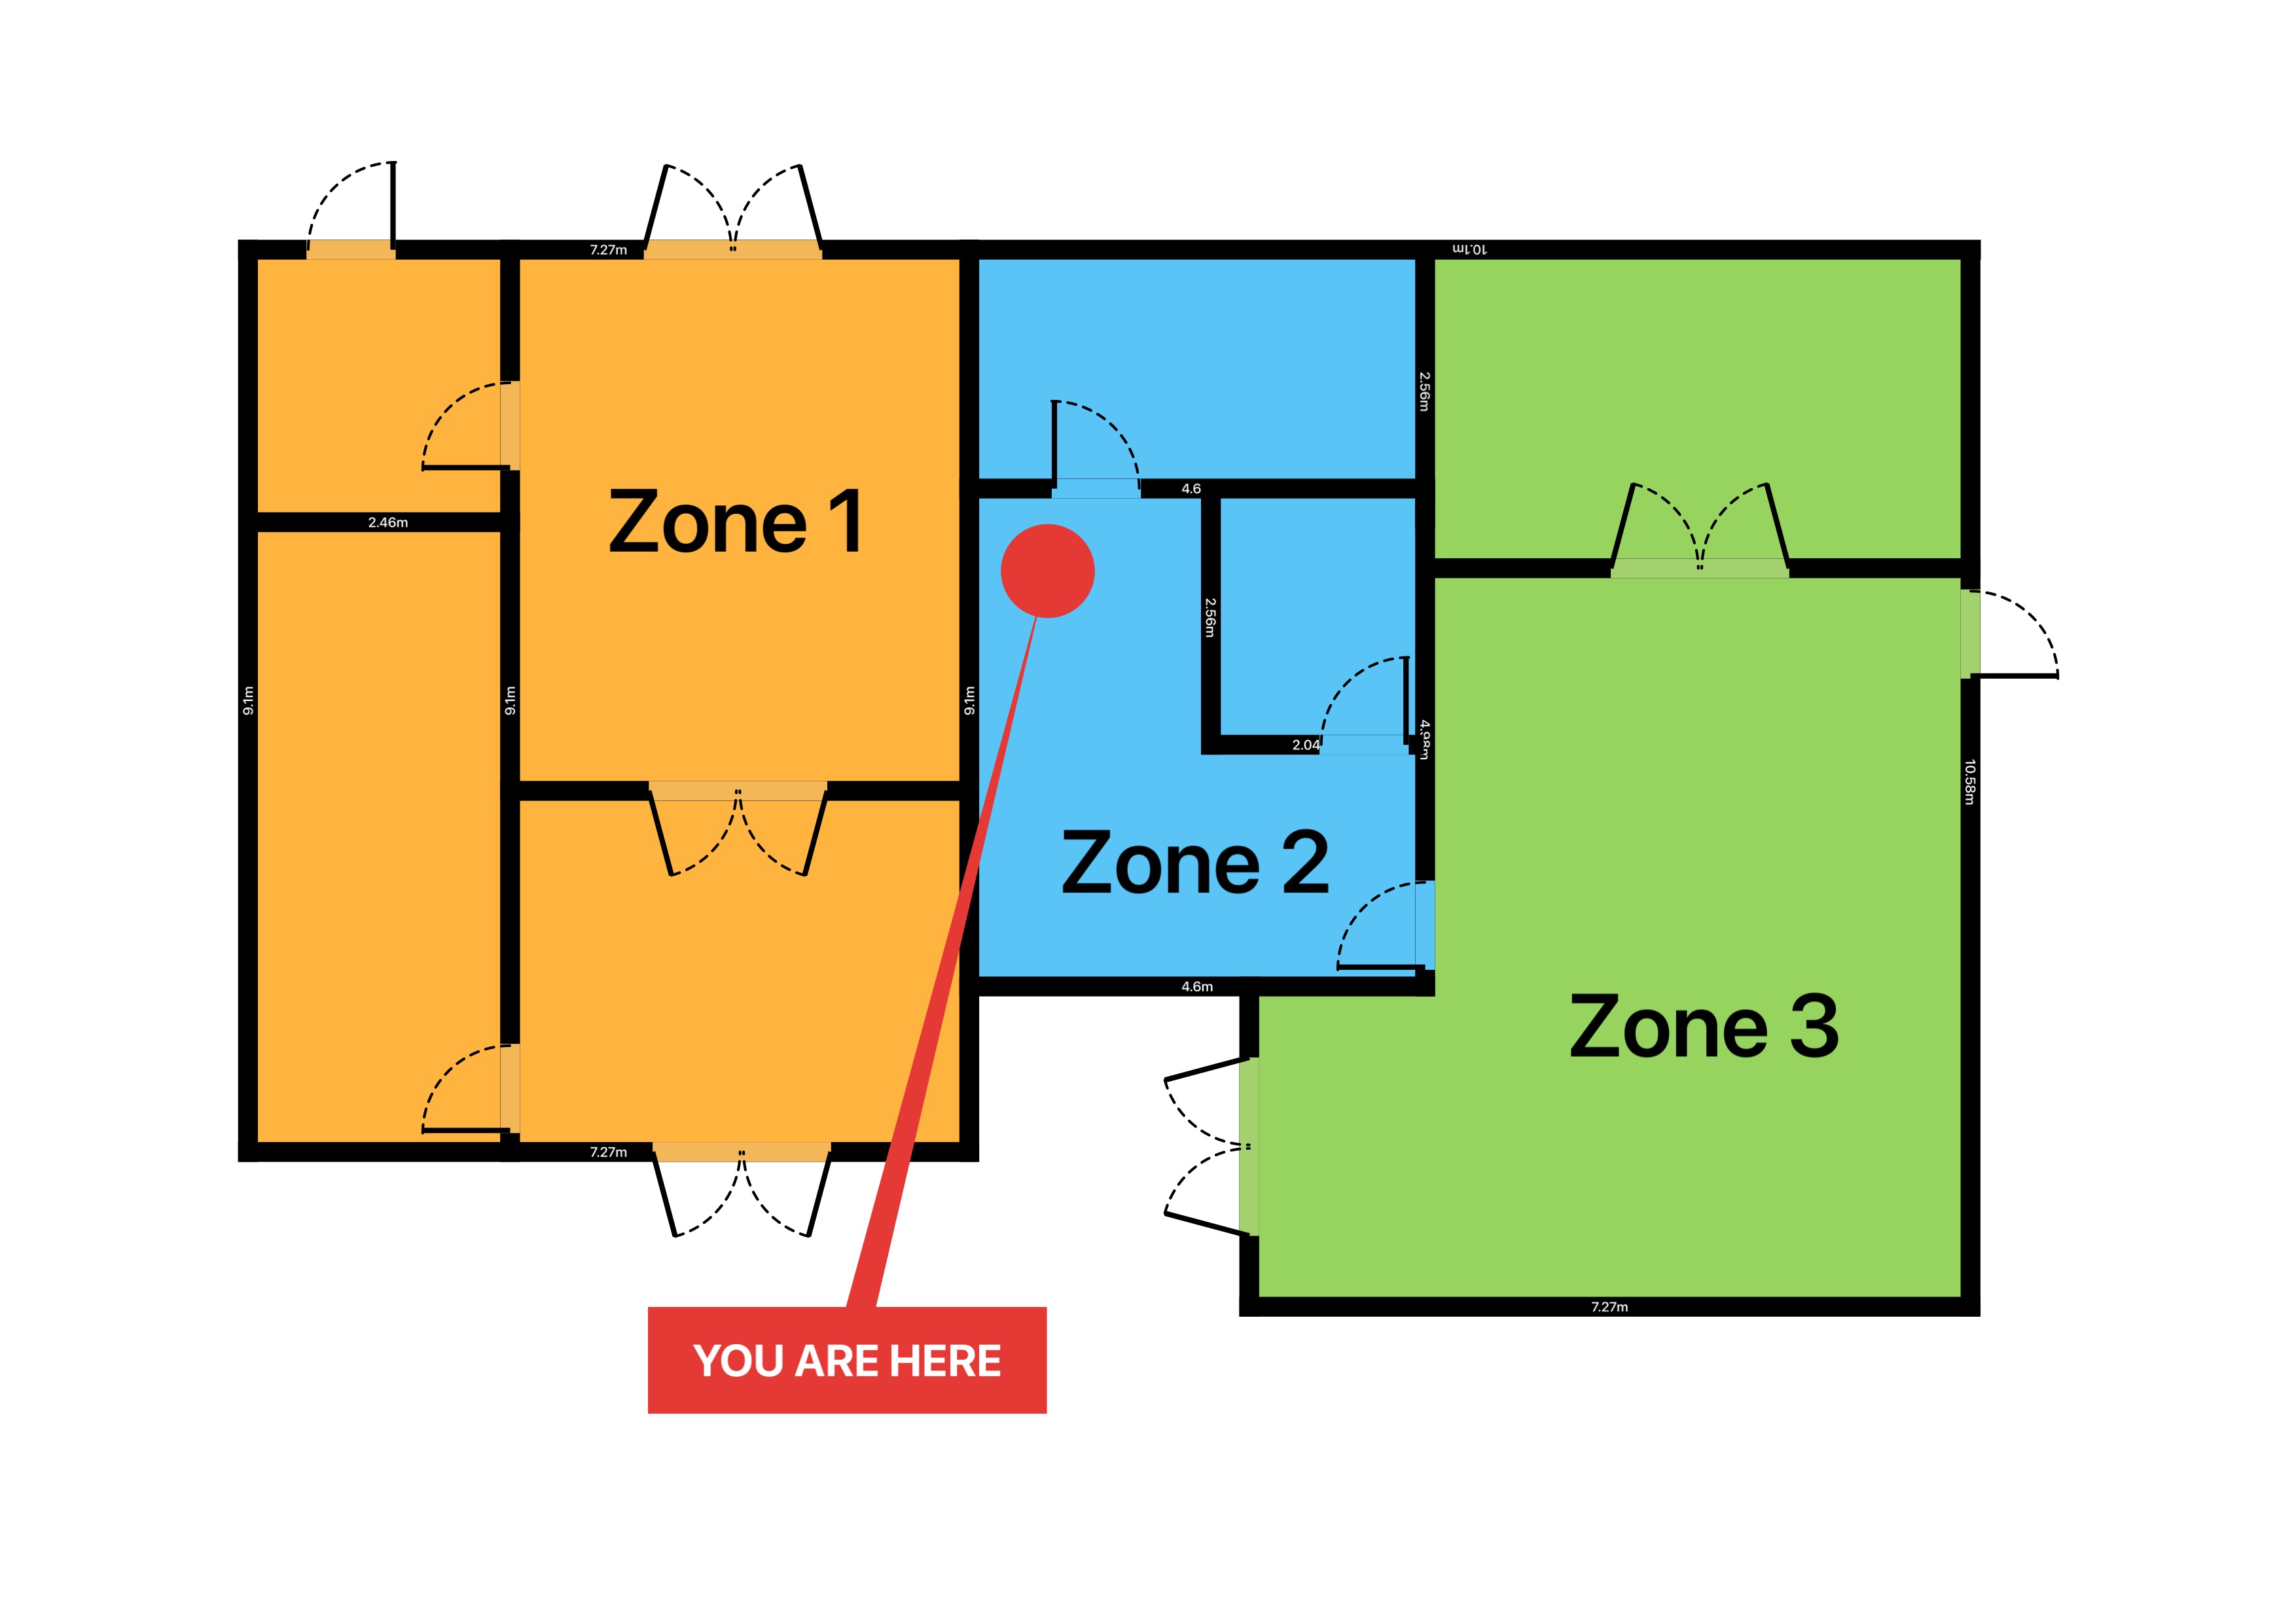
A fire escape plan is the one drawing in a building that has to be right when it matters most. It shows occupants the quickest safe way out, marks the assembly point, and gives the responsible person under the Regulatory Reform (Fire Safety) Order 2005 a record that escape routes were actually checked. This guide covers what UK law and ISO 23601 expect from a posted evacuation plan, then walks through drawing one on your iPhone or iPad - capture the layout, add the exits and route arrows, and export a clean PDF you can post on the wall or hand to a client.
Escape plan or zone plan - what's the difference?
They look similar but answer different questions. A fire alarm zone plan tells an engineer which detection zone a panel signal came from. A fire escape plan tells an occupant how to get out: routes, final exits, and where to gather. If you fit and maintain alarm systems you will often produce both, and RoomPlot draws each from the same underlying floor plan. For the detection side, see our guide to the fire alarm zone plan.
What the law and standards expect
In England and Wales, the Regulatory Reform (Fire Safety) Order 2005 makes the "responsible person" - usually the employer, owner, or whoever controls the premises - carry out a fire risk assessment and establish procedures for evacuation, including safe and effective means of escape. Since section 156 of the Building Safety Act 2022 took effect, the risk assessment and fire safety arrangements must be recorded in writing for all premises, not just larger employers. A drawn escape plan is one of the clearest ways to evidence that the escape strategy has been thought through.
For the diagram itself, the reference point is ISO 23601 (escape and evacuation plan signs). Its headline requirements are worth building into every plan you draw:
- A3 minimum (297 × 420 mm) for posted plans, at a scale of roughly 1:100 to 1:250 depending on building size, with larger formats for complex floors.
- "Heads-up" orientation - the top of the plan corresponds to what the viewer faces when standing in front of it.
- A clear "You Are Here" marker at the plan's mounting position.
- Symbols that conform to ISO 7010 and match the signs actually installed in the building, plus a legend explaining each one.
- Mounting with the plan centre about 1,400-1,600 mm above floor level, readable by standing and wheelchair users alike.
Houses in multiple occupation carry extra duties: the fire risk assessment applies to all HMOs whether or not they need a licence, and in room-only HMOs fire safety instructions - including the evacuation strategy - must be displayed where occupants can easily see them. Licence conditions vary, so confirm the specifics with your local authority or a competent fire risk assessor.
Step 1 - Capture the floor
Start with an accurate shell. On a Pro device with LiDAR you can scan the space and RoomPlot detects walls, doors, and windows automatically. On any other iPhone or iPad, draw the walls by hand - smart snapping keeps corners square, and room areas are calculated automatically so the plan doubles as a record of the space. Either way you finish with a fully editable 2D plan, not a flat picture. For a multi-storey building, add a floor for each level so every storey gets its own escape sheet - upper floors are exactly where escape planning gets hardest, so never leave them off.
Step 2 - Mark the escape routes and exits
This is the heart of the plan. From the object library, open the Fire Safety category and drop the symbols that matter for evacuation: emergency exit signs at every final exit, escape-route arrows along each corridor, fire doors on the protected route, a refuge point where one is provided, and an assembly point outside. Rotate each arrow so it points the way people should travel, and place a defibrillator (AED) or fire extinguisher symbol where the real equipment lives. Remember the RRO's basics as you route: emergency exits must lead as directly as possible to a place of safety, doors on the route open in the direction of escape, and nothing on the route may be locked so it cannot be opened immediately.
Keep the route colour consistent with the signage people already follow. Under ISO 7010 and BS 5499 in the UK, green is the "safe condition" colour, so escape arrows and the running-man exit signs are green; red is reserved for fire-fighting equipment such as extinguishers and call points. US evacuation diagrams (NFPA 101 / NFPA 170) use the same idea - a clear "You Are Here" marker, a bold primary route and a marked assembly point - though exit signs there are often red. Drawing the arrows in green keeps your plan readable against the exit signs already on the wall.
Step 3 - Label, orient, and add a title
Make the sheet unambiguous. Add a North marker so the building's orientation is clear, give each space a label with its name, and use a banner title - the export banner can read something like "Fire Escape Plan" so anyone glancing at it knows what they are looking at. If the plan will hang in more than one location, export a version per location with its own "You Are Here" marker rather than reusing a single sheet. Keep the styling calm and high-contrast: dark walls on a white background with green routes reads better on a wall than a busy, decorated template.
Step 4 - Export the plan
When the routes are in, export. Options include:
- Single-page PDF or PNG (A4 or 300 dpi) for a quick handout or to post by an exit - print at A3 or larger where ISO 23601 applies.
- Multi-page report PDF (A4 portrait) with a cover page, a symbol legend, and a page per floor - ideal for a building with several storeys, or as the escape-route annex to a fire risk assessment.
- DXF if a colleague needs to open the geometry in a CAD package.
The automatic legend builds a "Symbol / Name / Count" table of every symbol you used, so an assessor can see at a glance how many exits, extinguishers, and refuge points are on the plan - and ISO 23601 expects a legend on every posted sheet anyway. When you mount the print, aim for the plan centre at about 1.4-1.6 m above floor level.
Keep it current
An escape plan is only useful while it matches the building. Review it whenever the layout changes - a new partition, a blocked corridor, a relocated exit - and at least alongside the fire risk assessment review, which most assessors run annually or at a change of occupancy. Because the RoomPlot drawing is fully editable, updating it is a five-minute job rather than a redraw: reopen the plan, move the affected walls and arrows, and re-export. With iCloud sync enabled the current version follows you across iPhone and iPad, so the plan on site is never an old copy.
Ready to draw yours? Open RoomPlot, capture the floor, and drop in the exits and route arrows - you'll have a clear, postable fire escape plan before you leave site. Browse more trade guides on the guides index.