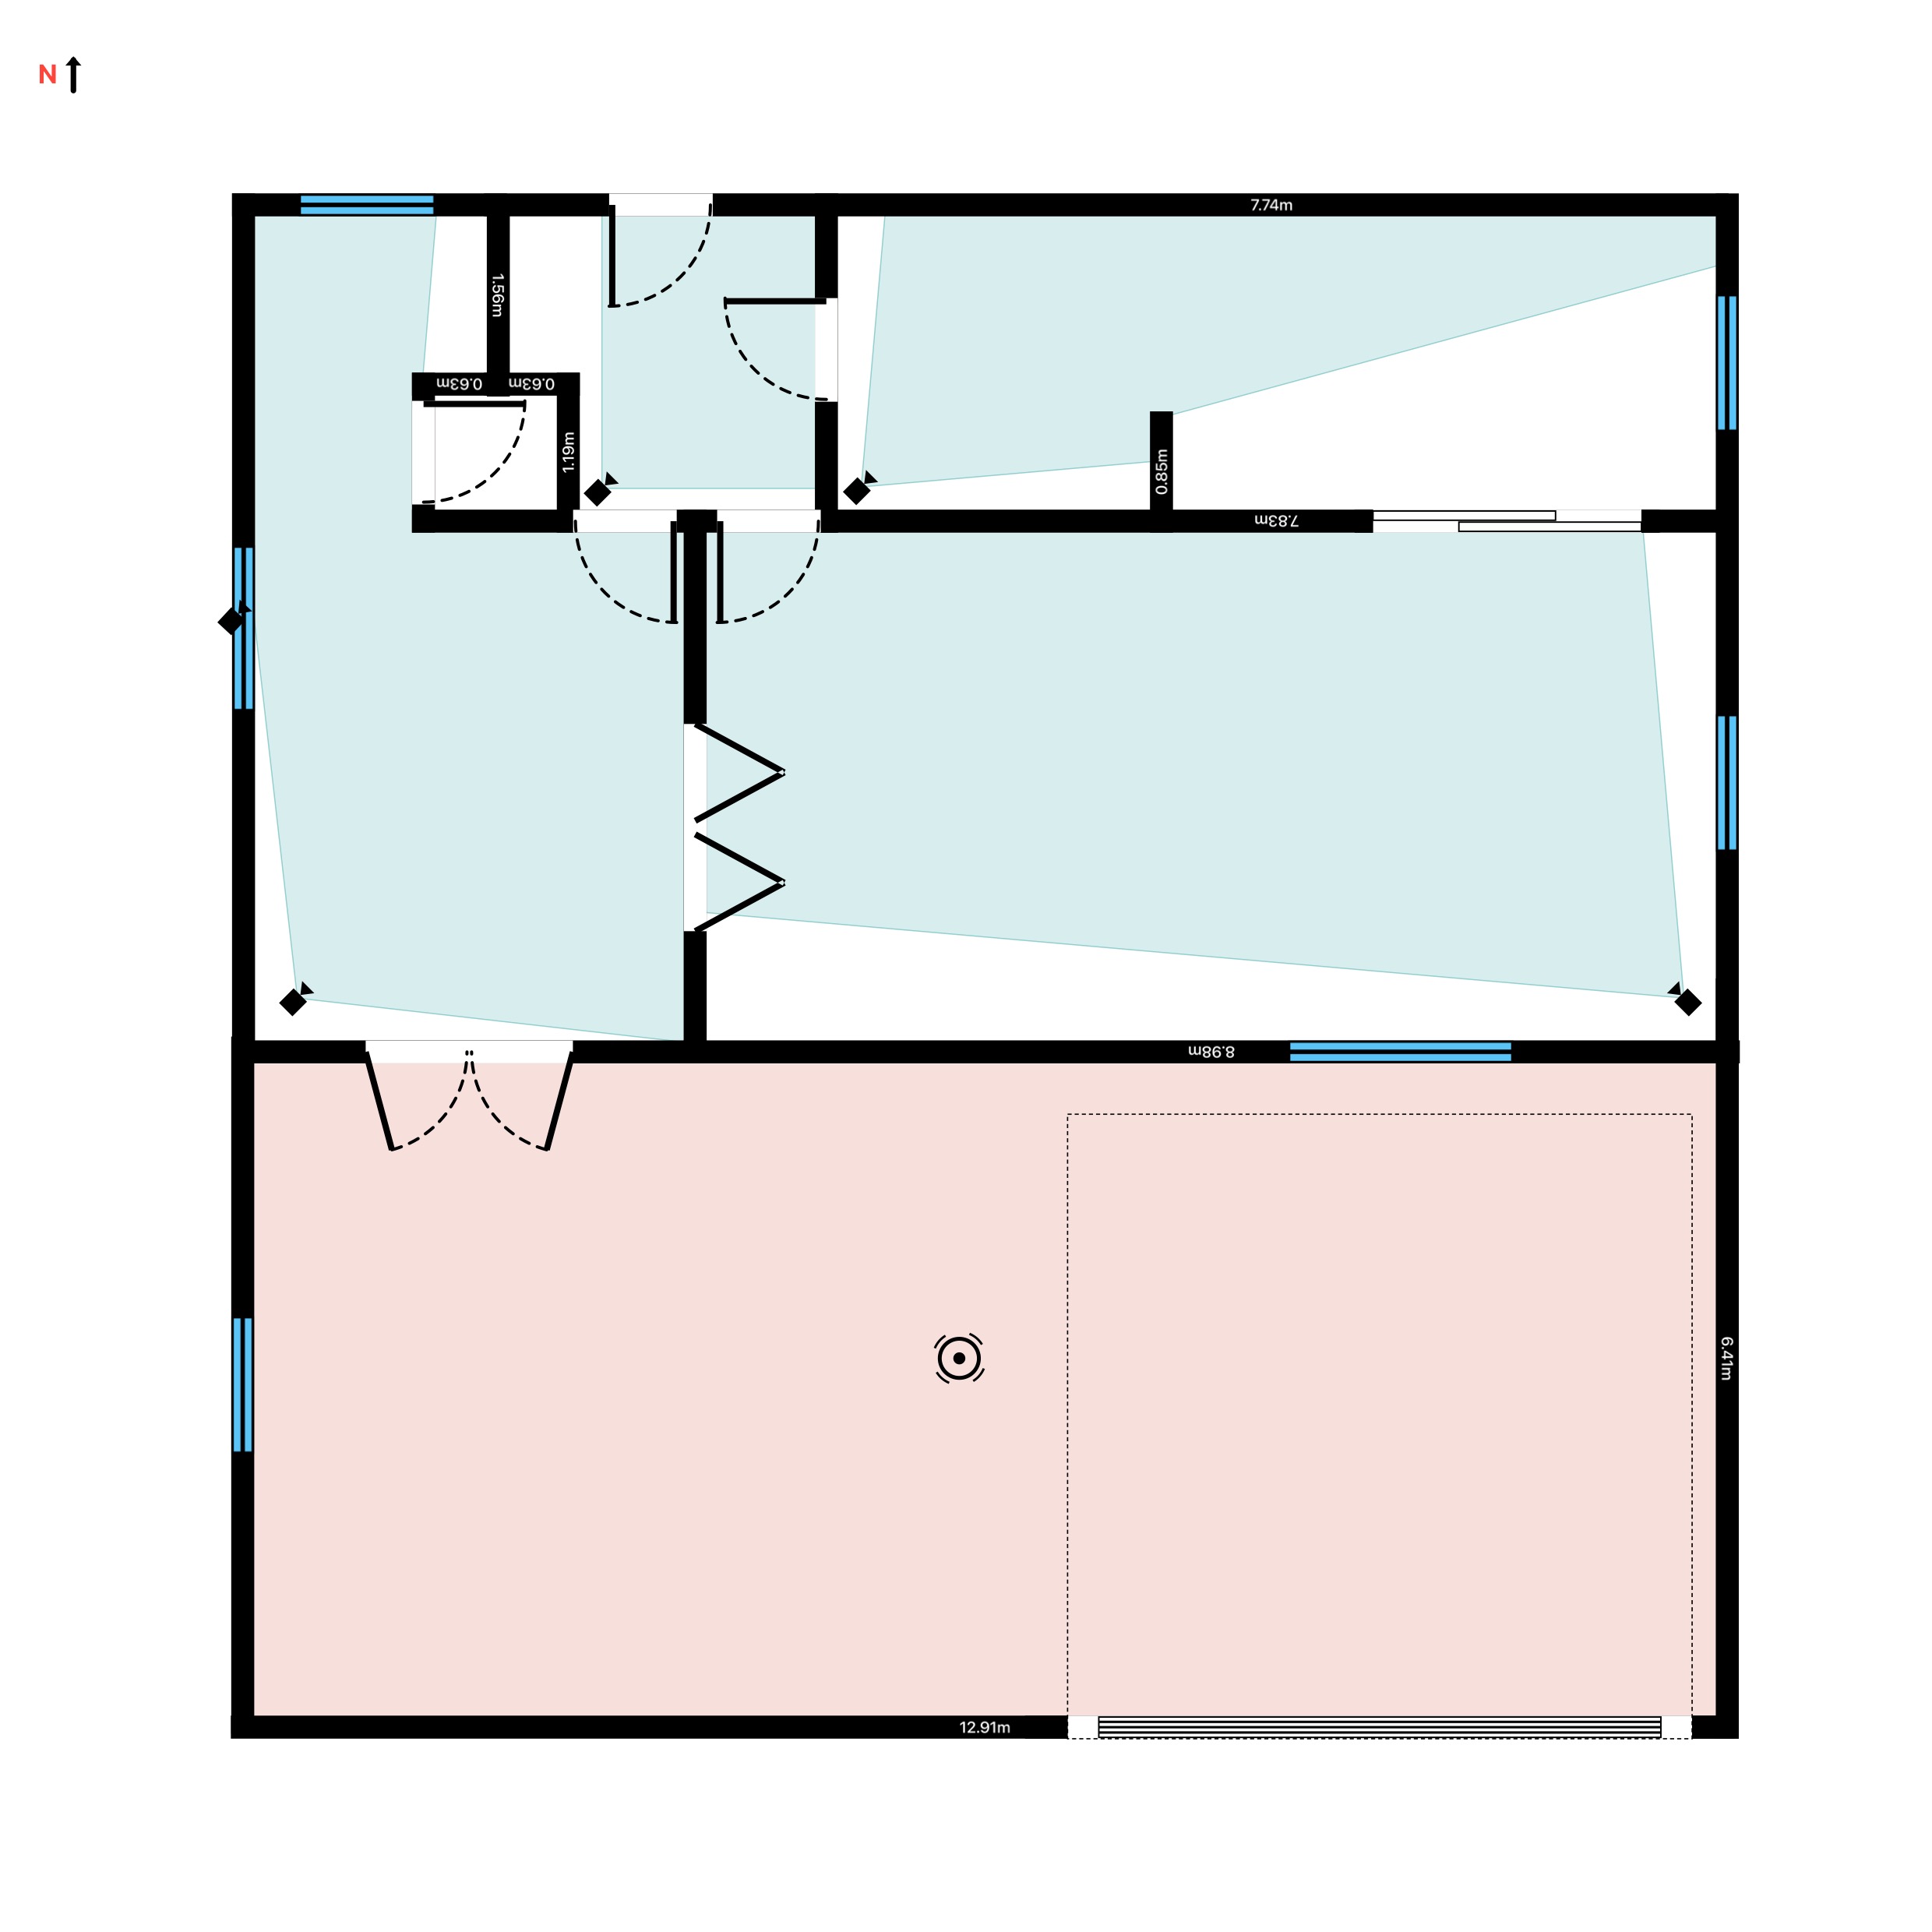
A good home CCTV system is not about buying more cameras - it is about putting a handful in the right places so that every door, gate and blind corner is covered and nothing is wasted watching a blank fence. The cheapest way to get that right is to plan it on a floor plan first, before you drill a single hole. This guide shows how to lay out a home system that actually covers the property.
Start from the intruder's point of view
Walk the plot the way someone testing your security would. They head for the least-overlooked way in: a side return, a back gate, a flat-roof extension, a dark corner of the drive. Mark every one of those approaches on your plan first, then place cameras to watch them. A home usually needs between three and eight cameras - the goal is to cover the routes, not to point a camera at every wall.
Prioritise, roughly in this order:
- The front door and porch - deliveries, callers and the most common approach.
- Every other ground-floor door - back doors, patio doors and side doors are the quiet way in.
- The driveway and gate - vehicles, number plates and anyone approaching the house.
- Side returns and blind corners - the narrow passages people use to reach rear windows unseen.
Map each camera's real coverage on the plan
A camera only sees what is inside its field of view (FOV) and range, and it cannot see through walls or around corners. RoomPlot draws the area each camera actually covers: drop a dome, bullet, turret, PTZ or 360 camera on the plan and it paints a wall-occluded FOV cone - a ray-fan that is cut off by walls, so the shadow behind a corner or a projecting bay appears the moment you aim the camera. Coverage switches on automatically when you place a device and updates live as you rotate or move it. Each family has a sensible default (dome and turret 90 degrees by 10 m, bullet 60 degrees by 15 m, PTZ 360 degrees by 20 m, a 360 camera 360 degrees by 8 m), and you can tune the FOV from 10 to 360 degrees and the range up to 40 m to match the exact lens you plan to fit.
Get the height, angle and lens right
Placement is as much about geometry as position. A few rules that hold for almost every home:
- Mount high, around 2.5 to 3 m. High enough to be out of easy reach, low enough to still read a face rather than the top of a head.
- Tilt down 15 to 30 degrees so the useful part of the frame is at shoulder and face height, not sky or doorstep.
- Match the lens to the space. A wide 90 to 110 degree lens suits a drive or garden; a narrow lens suits a long side passage or a gate where you want a plate or a face.
- Do not shoot through glass. An indoor camera looking out of a window flares at night from its own reflection - use a proper outdoor camera instead.
- Mind the sun. An east or west aspect washes out at dawn and dusk; angle away from it or lean on a camera with good wide dynamic range.
Tip. Overlap your cones so each camera watches the approach to the next one. If Cam 1 covers the drive and Cam 2 covers the front door, position them so a person walking up is never out of shot - a gap between two cameras is exactly where someone will stand.
Turn the plan into a quote and a record
Once the layout looks right, the plan does double duty. Add a scale bar and a north arrow, label each device, and export a clean PDF or PNG for the homeowner so they can see what each camera watches before they commit. Because RoomPlot works entirely on your iPhone or iPad, you can walk the property, drop cameras, and hand over a coverage plan in the same visit - no laptop, no redraw back at the office. For a wired system you can sketch cable runs back to the recorder on the same plan, and export to DXF if your installer wants it in a CAD package.
If you want to go deeper on eliminating gaps, read our guide on how to avoid CCTV blind spots, or browse the full set of RoomPlot guides for more on surveys and coverage.
Ready to plan your home CCTV?
Open RoomPlot, scan or draw your property, and drop your cameras where they earn their keep. You will see the coverage the instant you place each one - and know your home is watched where it matters before a single bracket goes on the wall.