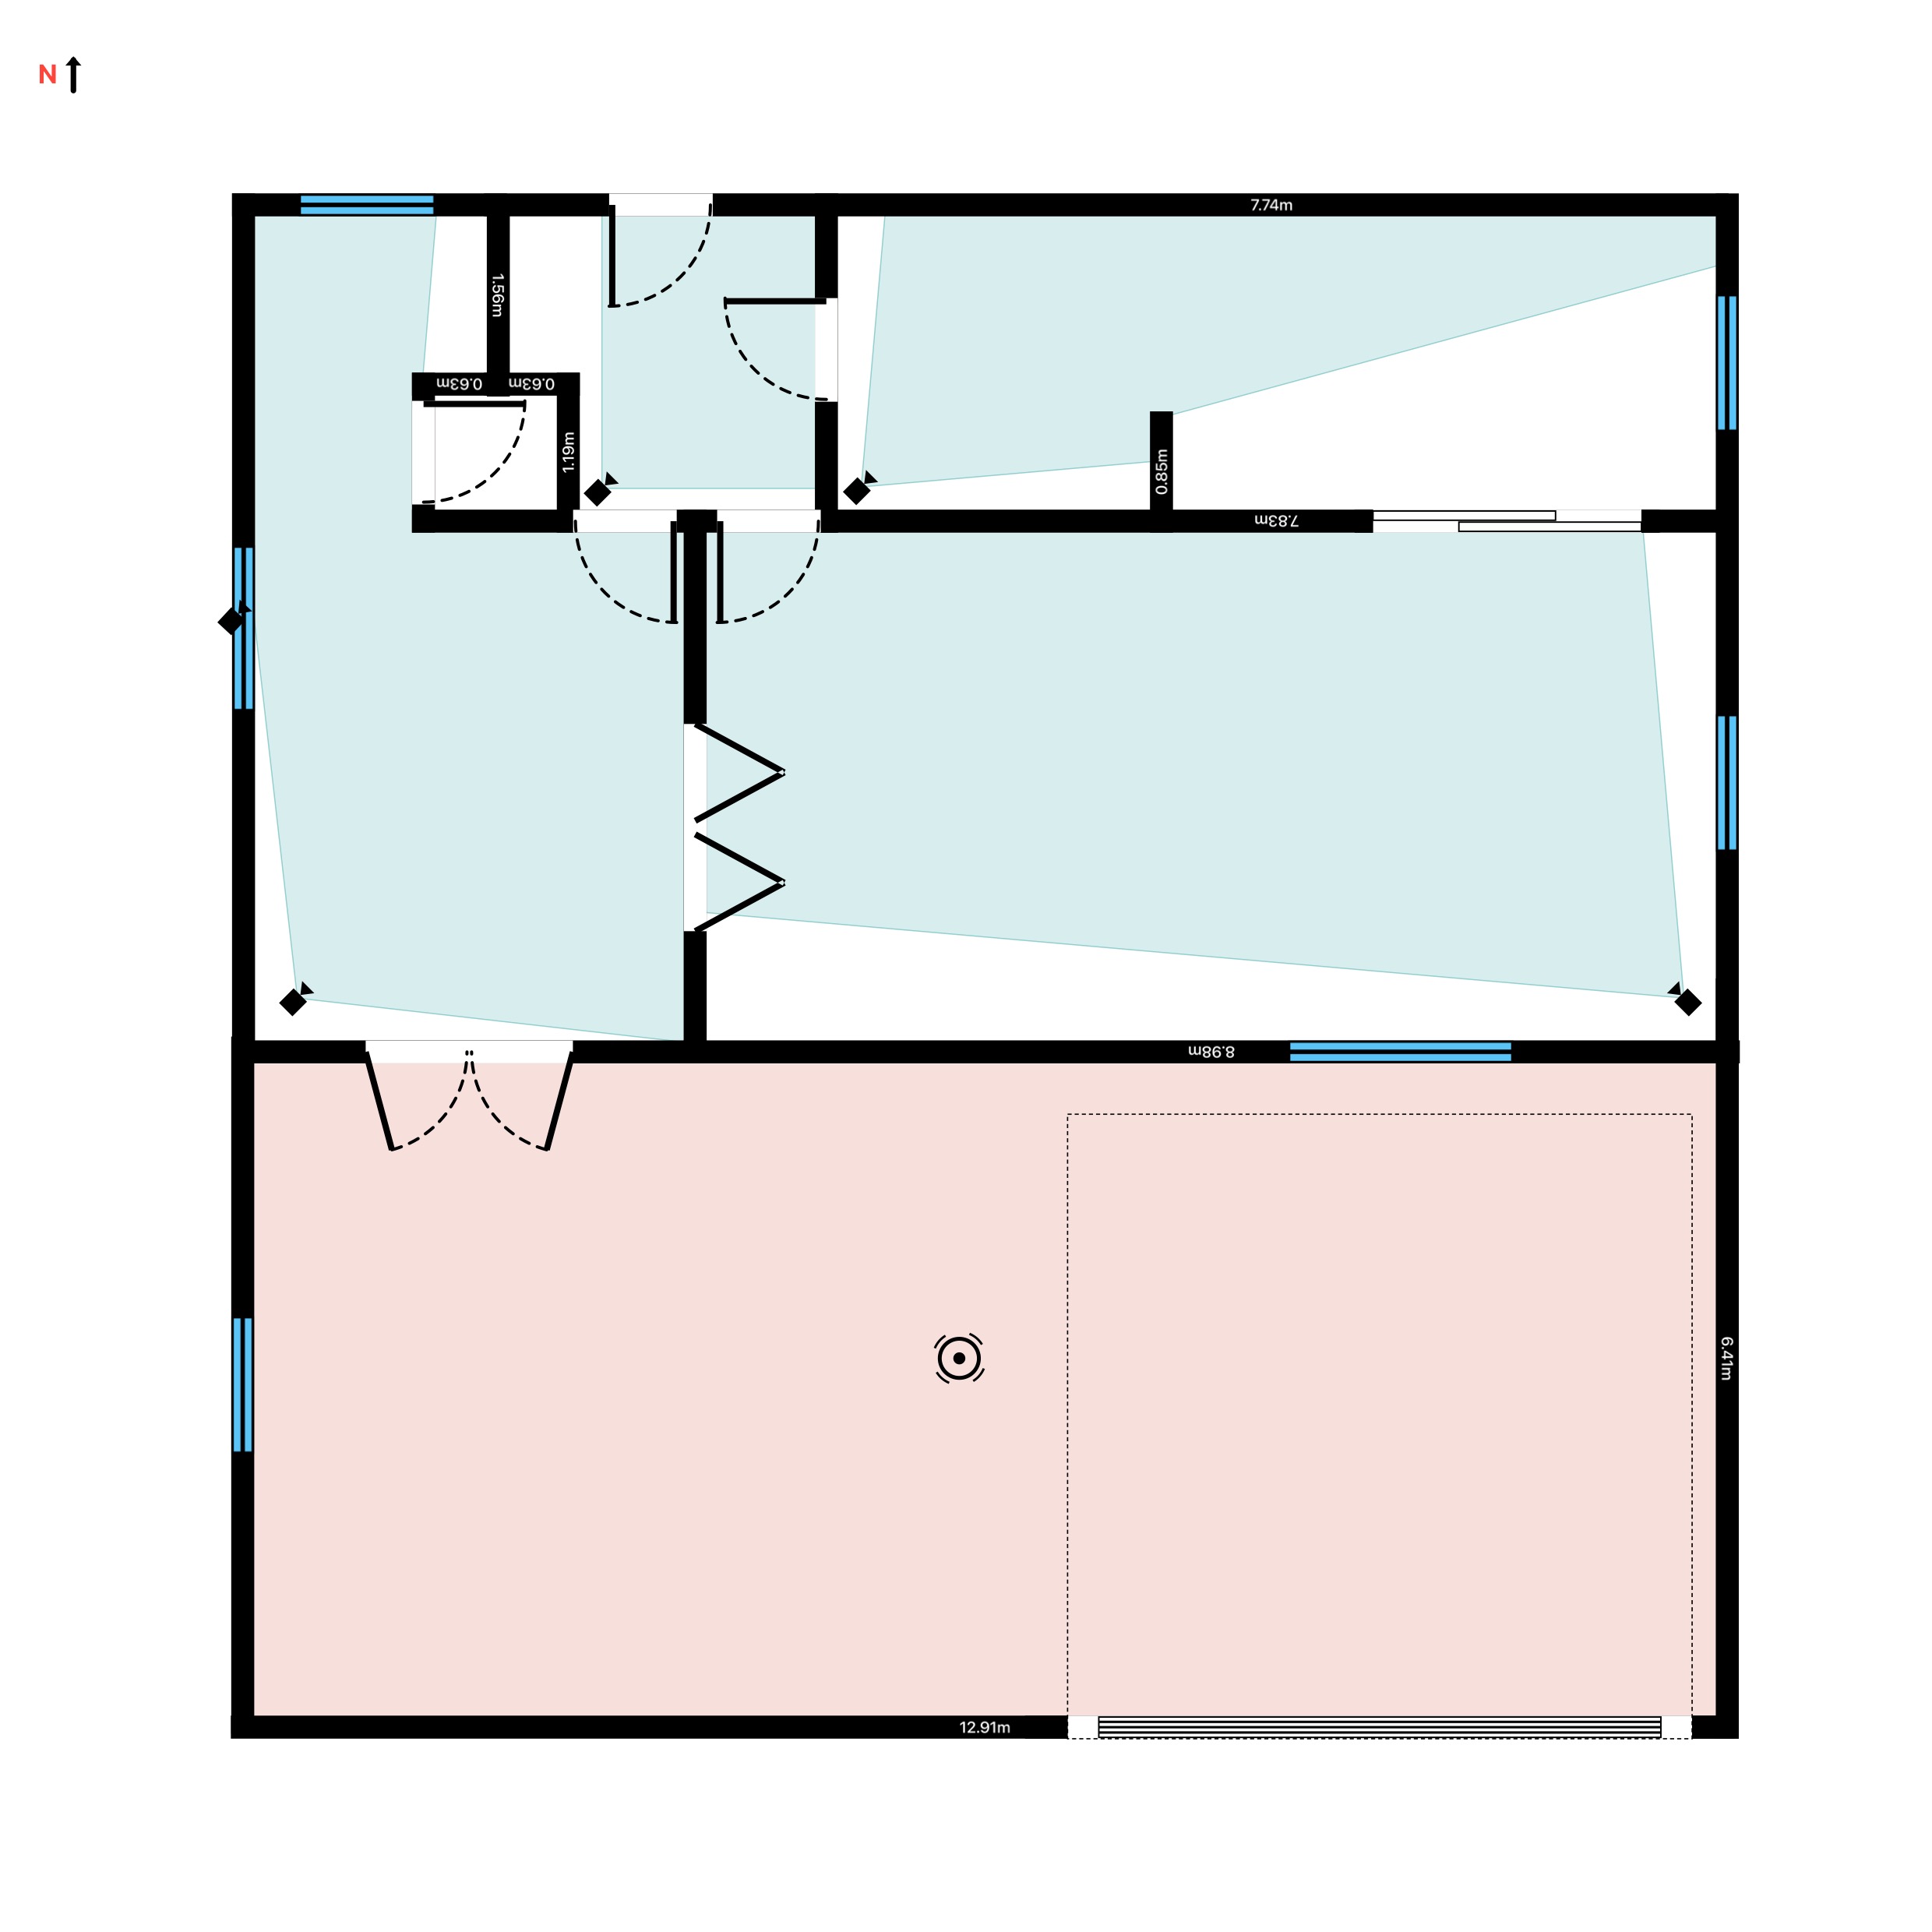
A burglar alarm is only as good as where its sensors point. Place a PIR badly and it either misses an intruder or cries wolf at the family cat and the afternoon sun. The professional way to get it right is to plan the placement on a floor plan first - and because RoomPlot draws the exact area a sensor covers, you can see the blind spots before you drill a single hole. Here is how to place motion sensors well.
How a PIR actually sees
A passive infrared (PIR) sensor detects the heat of a body moving across its field of view. The key word is across: a PIR is far more sensitive to movement that cuts sideways through its beams than to someone walking straight at it. That single fact drives every placement decision - you want an intruder to cross the detection pattern, not march down its centre line.
The rules of good placement
- Mount in a corner. A corner gives the widest sweep of the room from one device and lets movement cross the beams.
- Mount at the height the datasheet asks for. Most PIRs are designed for roughly 2 to 2.4 m; mount them much higher or lower and the beam pattern lands in the wrong place.
- Cover the choke points. Hallways, landings, and the foot of the stairs are routes an intruder must use whatever their target - a sensor there catches them regardless.
- Mount along a hallway, not at the end of it. Side-on placement means anyone walking the corridor crosses the field of view.
- Keep heat and movement out of view. Aim away from radiators, sunny windows, and moving curtains or ceiling fans to avoid false alarms.
- Protect the valuables. A sensor covering the route to the most likely target earns its place.
Choose the right sensor for the room
Placement and sensor choice go together, and RoomPlot's security catalog carries a symbol for each so the plan says exactly what to fit where:
- Standard PIR - the default for most rooms; corner-mounted for the widest sweep.
- Pet-immune PIR - for homes with cats or dogs; the beam pattern ignores small bodies at floor level, so use it in rooms pets roam at night.
- Dual-tech (PIR + microwave) - for difficult spaces like conservatories, garages, and rooms with draughts or heaters, where a PIR alone would false-alarm.
- Beam detector - a long, narrow corridor of detection, ideal across a run of patio doors or a warehouse aisle.
Plan it on a floor plan first
This is where RoomPlot changes the job. Scan or draw the property, then drop an intruder detector onto the plan. RoomPlot immediately draws the area it covers as a wall-occluded detection cone - a real visibility calculation that raycasts against the walls, so anything hidden behind a corner shows as a blind spot, live, as you aim the sensor. A PIR starts with a realistic 90 degree by 12 m cone; rotate it to face the room, and stretch the field of view (10-360°) and range (up to 40 m) to match the datasheet of the sensor you are fitting. No competitor computes coverage against the walls like this.
Move the sensor around the plan until the shaded cone fills the room and reaches the doorway with no gap. If one device cannot see the whole space, that is your cue to add a second - and you will know before you are up a ladder.
Tip. Give each device its own colour on the plan and turn on the global coverage overlay. Overlapping cones in the wrong place waste sensors; a gap by the patio door is a way in. Both are obvious the moment you can see the coverage drawn to scale.
Hand over a proper survey
When the layout is right, export it. RoomPlot bakes the coverage overlay into a single-page PDF or a branded multi-page report, and the report's auto-generated legend counts every symbol on the plan - so the quote, the kit list and the drawing always agree. Pair the intruder layout with cameras for a complete security design - see how to plan CCTV camera coverage and how to plan an intruder alarm system layout, or browse the full guides library.
Guesswork puts sensors in the wrong place. Plan the coverage on the actual walls, close every gap, and hand the client a survey that shows the protection they are paying for. Open RoomPlot and map your sensor coverage today.